
Install on Ubuntu
This guide deploys Fast-Https on Ubuntu from a .deb package. .deb is the package format used by Ubuntu and Debian; installing it with apt registers a system service that can start automatically at boot.
Before you start
- Run every command in the server’s terminal.
- You need an account with
sudoprivileges.sudoruns a single command with administrative rights and may ask for your password. - The default site uses ports 80 and 443. On a cloud server, allow both in the console first and make sure no other program (such as Nginx) occupies them — step 3 shows how to check.
- Download the package from Gitee Releases or GitHub Releases; use the latest version shown on that page.
1 Check the architecture and download the package
Different processors need different packages. Check yours:
dpkg --print-architecture
amd64→ download the package whose filename containsamd64(most cloud servers)arm64→ download the package whose filename containsarm64
Download the package on the server. The example below is for amd64; replace the version numbers with the latest ones from the releases page:
wget https://gitee.com/ncepu-bj/fast-https/releases/download/v1.6.0/fast-https_1.6.0_linux_amd64.deb
ls -lh *.deb
ls -lh lists the downloaded file and its size — seeing it means the download worked. You can also click the link on the releases page and upload the file to the server instead.
| Architecture | Server package | Download |
|---|---|---|
amd64 | fast-https_1.6.0_linux_amd64.deb | Gitee / GitHub |
arm64 | fast-https_1.6.0_linux_arm64.deb | Gitee / GitHub |
Choose the server package: files starting with fast-https-desktop install the graphical desktop edition and are not needed on a server.
2 Install
Go to the directory containing the downloaded package and run the commands below. The ./ prefix means “this file in the current directory” and must not be omitted:
sudo apt install ./fast-https_1.6.0_linux_amd64.deb
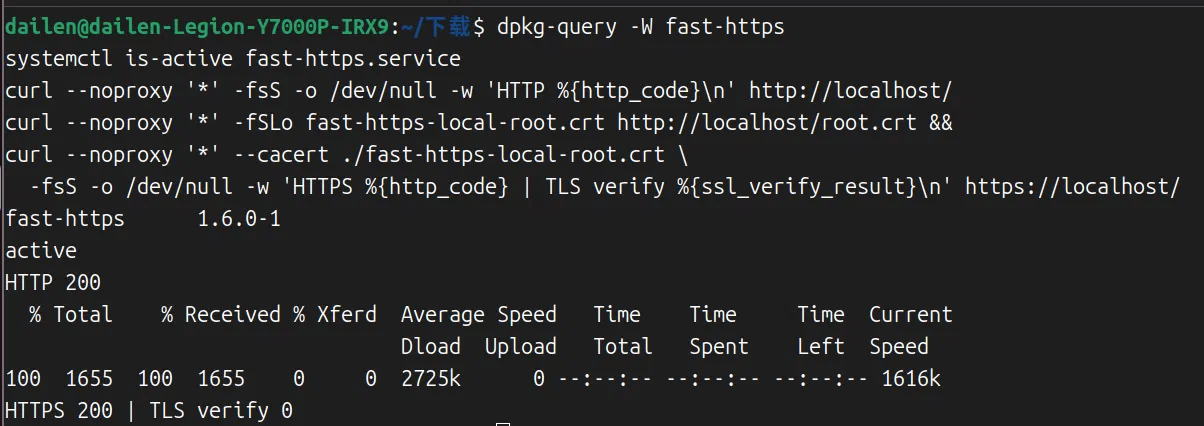
dpkg-query -W fast-https
On an arm64 system, use the arm64 filename from the table. dpkg-query prints the package name and version; seeing fast-https means the installation succeeded.
Installed file locations (you will need these when editing configuration or reading logs):
| Purpose | Installation path |
|---|---|
| Binary | /usr/bin/fast-https |
| Main configuration | /etc/fast-https/fast-https.json |
| Default site configuration | /etc/fast-https/conf.d/default.json |
| Default site root | /usr/share/fast-https/httpdoc/root/ |
| Certificates | /etc/fast-https/cert/ |
| Logs | /var/log/fast-https/ |
3 Start the service
First check whether ports 80 / 443 are already in use:
ss -ltn '( sport = :80 or sport = :443 )'
If only the header line (State Recv-Q ...) appears, the ports are free. If a process is listed, edit /etc/fast-https/conf.d/default.json and set listen to free ports, for example [18080, "18443 ssl h2"], then use those ports in the verification commands too.
The package registers a systemd service named fast-https.service. systemd is the component that manages background services on Linux; systemctl is the command used to control it.
sudo systemctl start fast-https.service
systemctl is-active fast-https.service
The second command should print active, which means the service is running.
4 Verify the default site
Test HTTP first:
curl --noproxy '*' -fsS -o /dev/null -w 'HTTP %{http_code}\n' http://localhost/
HTTP 200 means success. 200 is the status code for a successful request; --noproxy '*' bypasses any proxy configured on the machine so it cannot interfere with this local request.
On the first start, Fast-Https generates a certificate for localhost signed by a local CA. Download that CA certificate, then use it to verify the HTTPS connection:
curl --noproxy '*' -fSLo fast-https-local-root.crt http://localhost/root.crt &&
curl --noproxy '*' --cacert ./fast-https-local-root.crt \
  -fsS -o /dev/null -w 'HTTPS %{http_code} | TLS verify %{ssl_verify_result}\n' https://localhost/
HTTPS 200 | TLS verify 0 means HTTPS works and certificate verification passed (0).
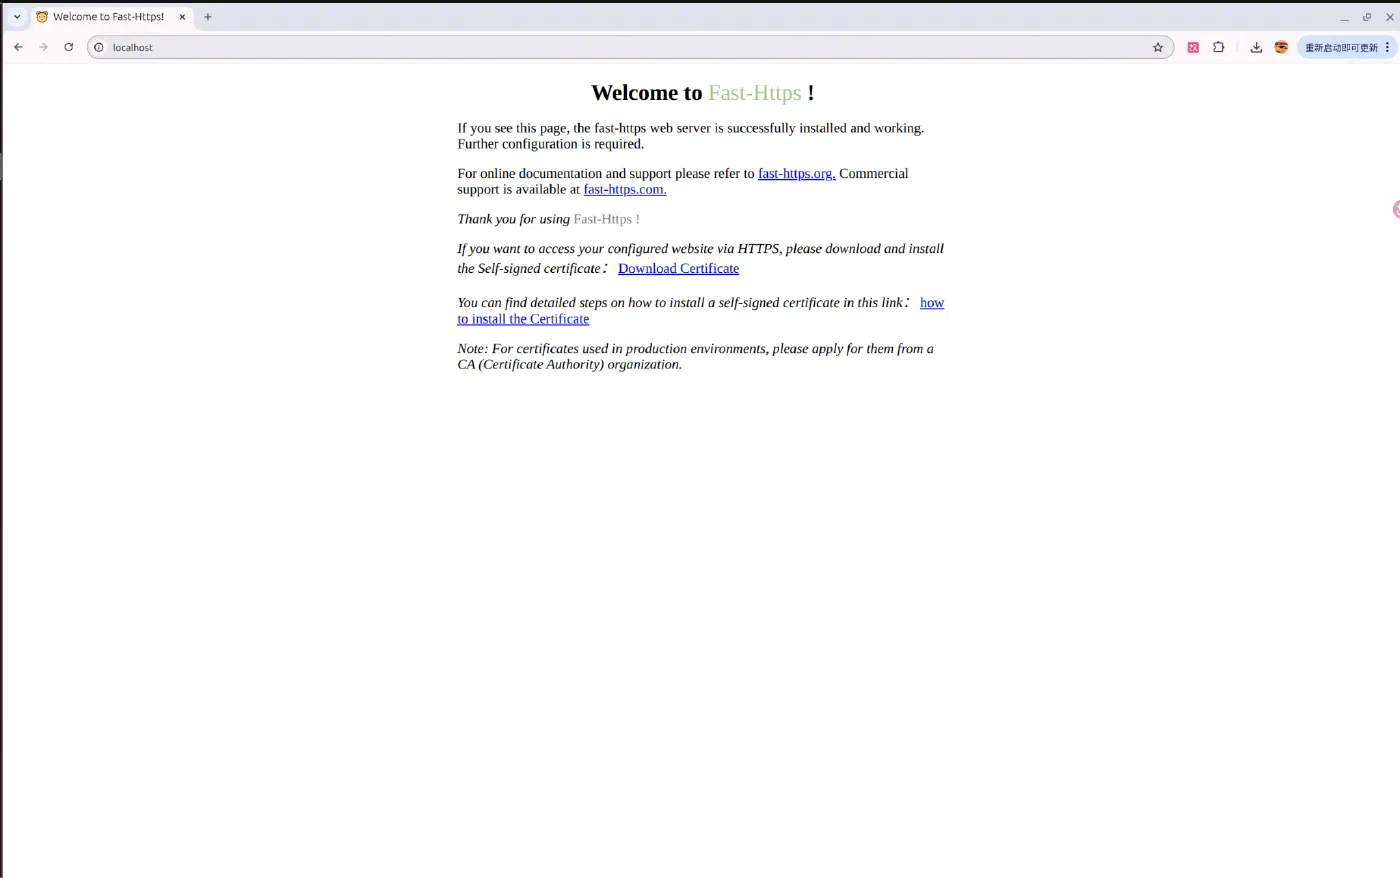
If the server is in front of you with a desktop, open http://localhost/ in its browser to see the default homepage. If the server is in the cloud, open http://<server public IP>/ in a browser on your own computer instead — localhost always means the machine you are currently working on.
A browser will warn that the certificate is not trusted when you open HTTPS. That is expected for a self-signed certificate; for a public service, install a certificate matching your domain.
5 Manage the service
The package registers fast-https.service, so use systemctl for day-to-day management:
sudo systemctl enable --now fast-https.service   # start now and enable at boot
sudo systemctl restart fast-https.service        # restart after a config change
systemctl status fast-https.service --no-pager   # inspect status
sudo journalctl -u fast-https.service -n 30 --no-pager  # read recent logs
For a local test you can stop the service after verification; disable --now also disables startup at boot:
sudo systemctl stop fast-https.service
sudo systemctl disable --now fast-https.service
To remove the package while keeping configuration, certificates and logs:
sudo apt remove fast-https
6 Troubleshooting
| Symptom | What to do |
|---|---|
| Download returns 404 | The version number is wrong; check the latest tag and filename on the releases page |
apt cannot find the file | Confirm you are in the directory with the package, and that ./ and the filename are correct |
is-active does not print active | Run systemctl status fast-https.service --no-pager for the error, then check the logs |
| curl returns 000 or connection refused | The service is not running — go back to step 3; if you changed ports, update the verification URLs too |
| The page will not open on your computer | Check that port 80 is allowed in the cloud security group, and use the server’s public IP rather than localhost |
For a public deployment, set server_name to the hostname or IP clients will use and allow the required ports in the firewall and cloud security group.
Next steps
The default site only confirms the installation. To publish your own site or configure a reverse proxy, see the Tutorials section in the sidebar.