
Installer
Download the Windows installer (.exe) from the release page, run it and follow the wizard. Compared with the zip package, the installer writes the program into a chosen folder, creates shortcuts, is removed through Windows “Apps & features”, and ships the graphical desktop client.
1 Download the installer
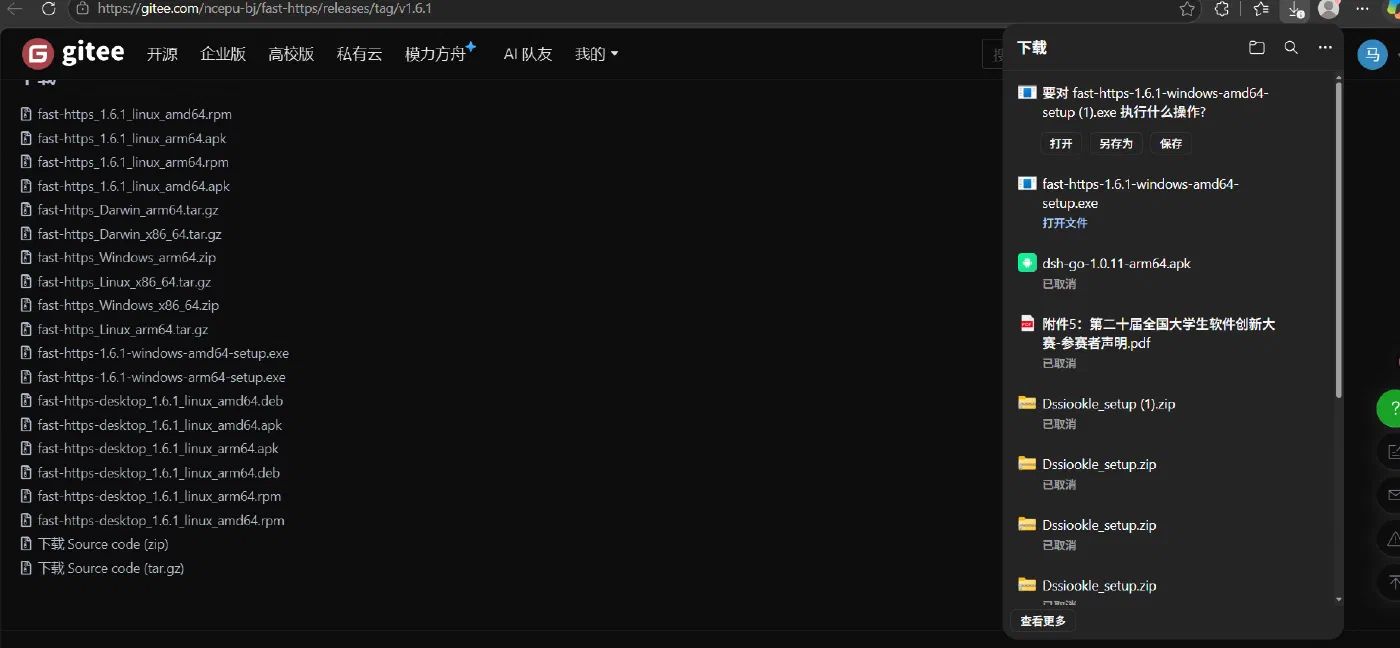
Find it in the v1.6.1 assets on the release page and download it:
fast-https-1.6.1-windows-amd64-setup.exe      # x64
fast-https-1.6.1-windows-arm64-setup.exe      # ARM64
Match on fast-https-<version>-windows-<arch>-setup.exe. The same page also offers fast-https_Windows_x86_64.zip if you prefer the portable build.
2 Run the wizard
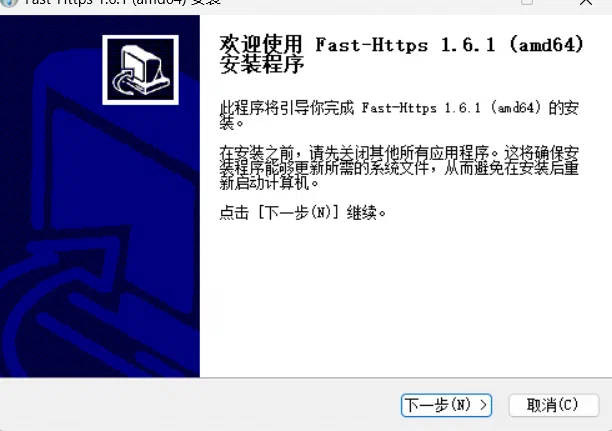
Double-click the downloaded setup.exe. Accept the UAC prompt if Windows shows one.
3 Choose the install folder
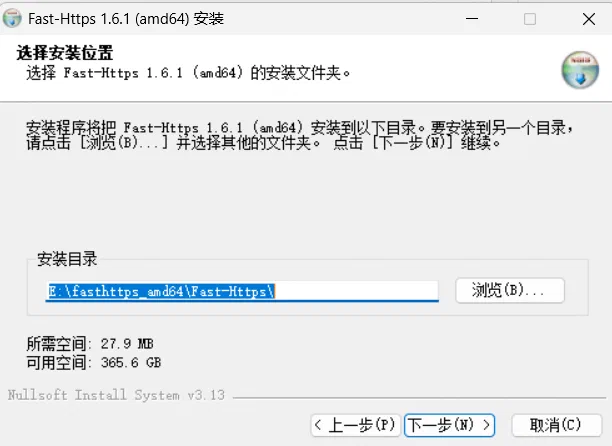
Click «Browse» to change the install path; avoid spaces and non-ASCII characters.
4 Finish the installation
Wait for the files to be written, then click «Next» to close the wizard.
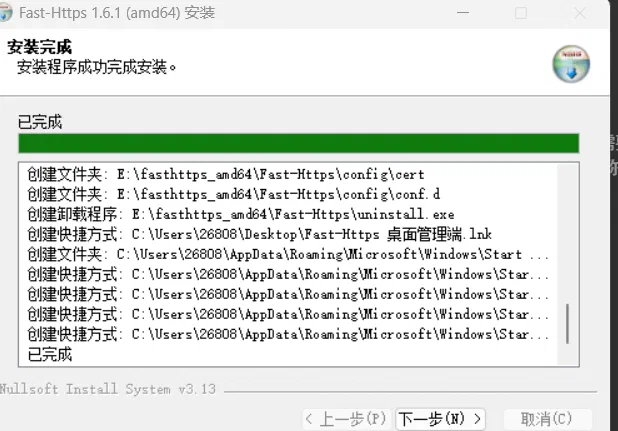
The installer creates a Fast-Https 桌面管理端 desktop shortcut, a Start-menu entry, and uninstall.exe.
5 Start and verify
5.1 Launch the desktop client
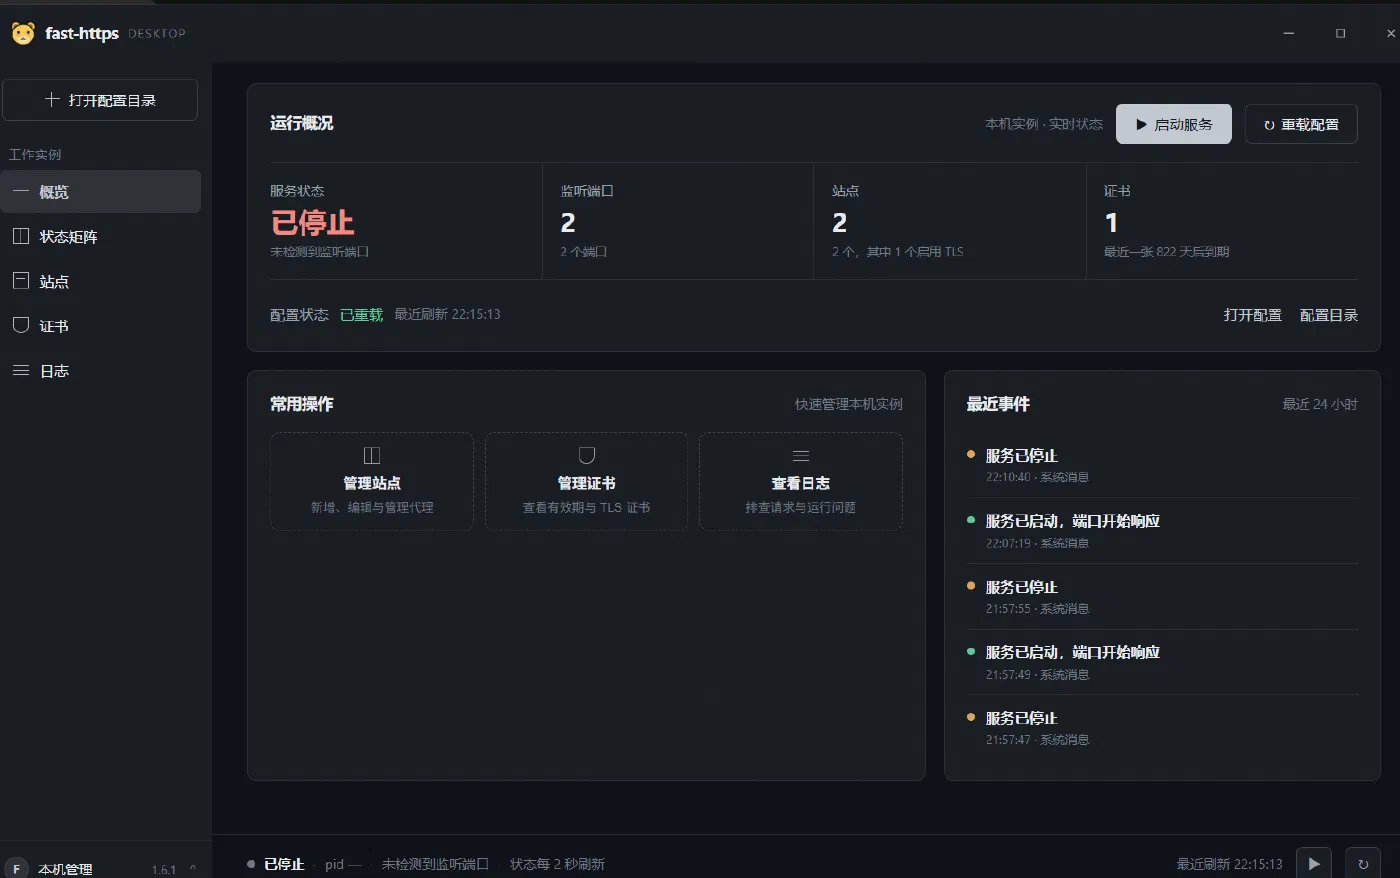
After installation, launch Fast-Https 桌面管理端 from the Start menu or the desktop shortcut. The service state is «Stopped» by default and the status bar shows pid —.
5.2 Start the service
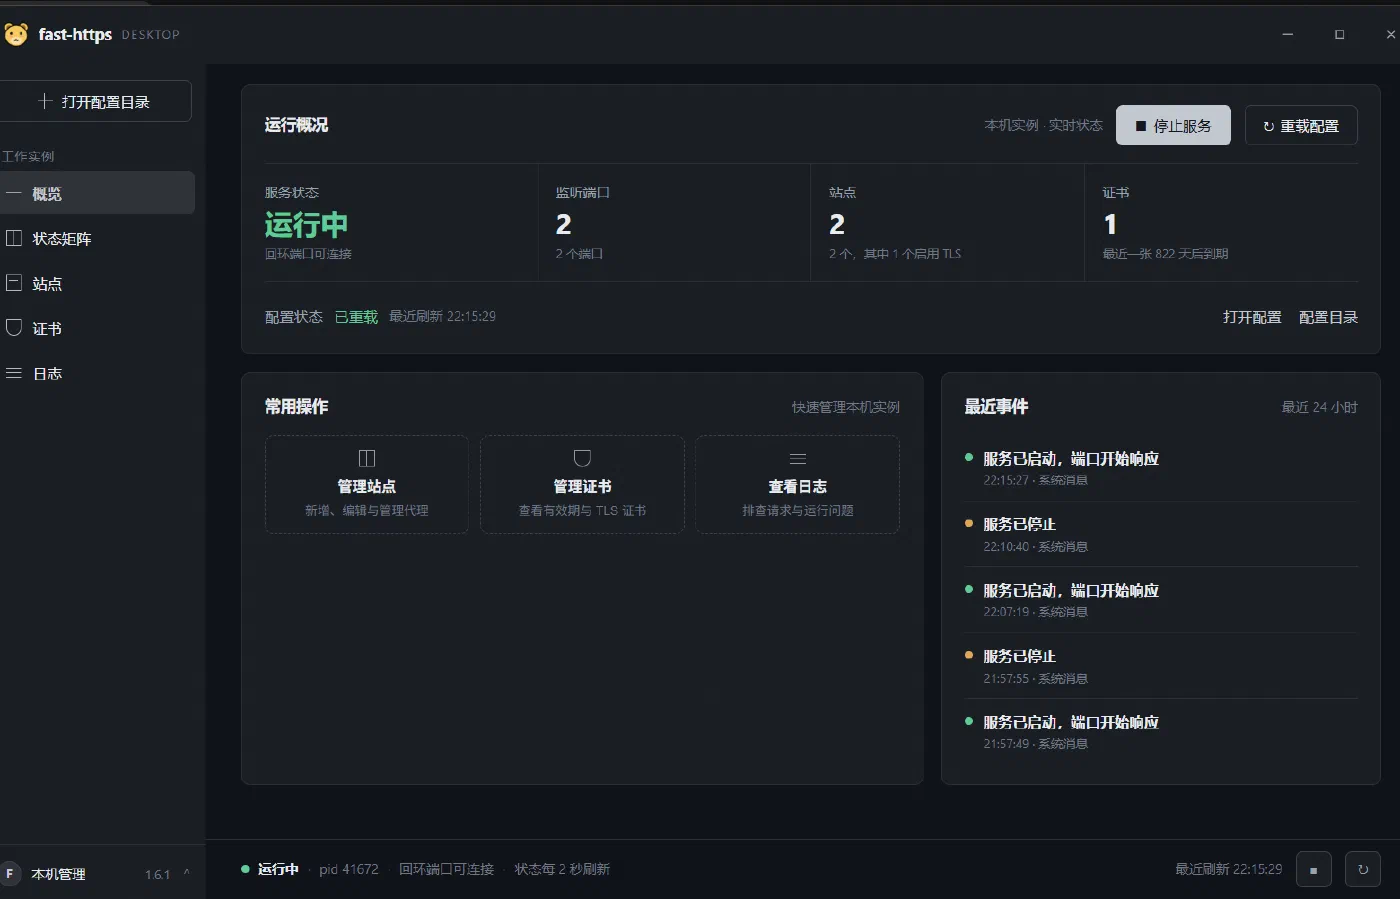
Click «启动服务» (Start service) in the top-right corner. When the state turns green «运行中» (Running) and the hint «回环端口可连接» (loopback port reachable) appears, the service is up. The button now reads «停止服务» (Stop service), and the status bar shows the process pid.
5.3 Browse the site list
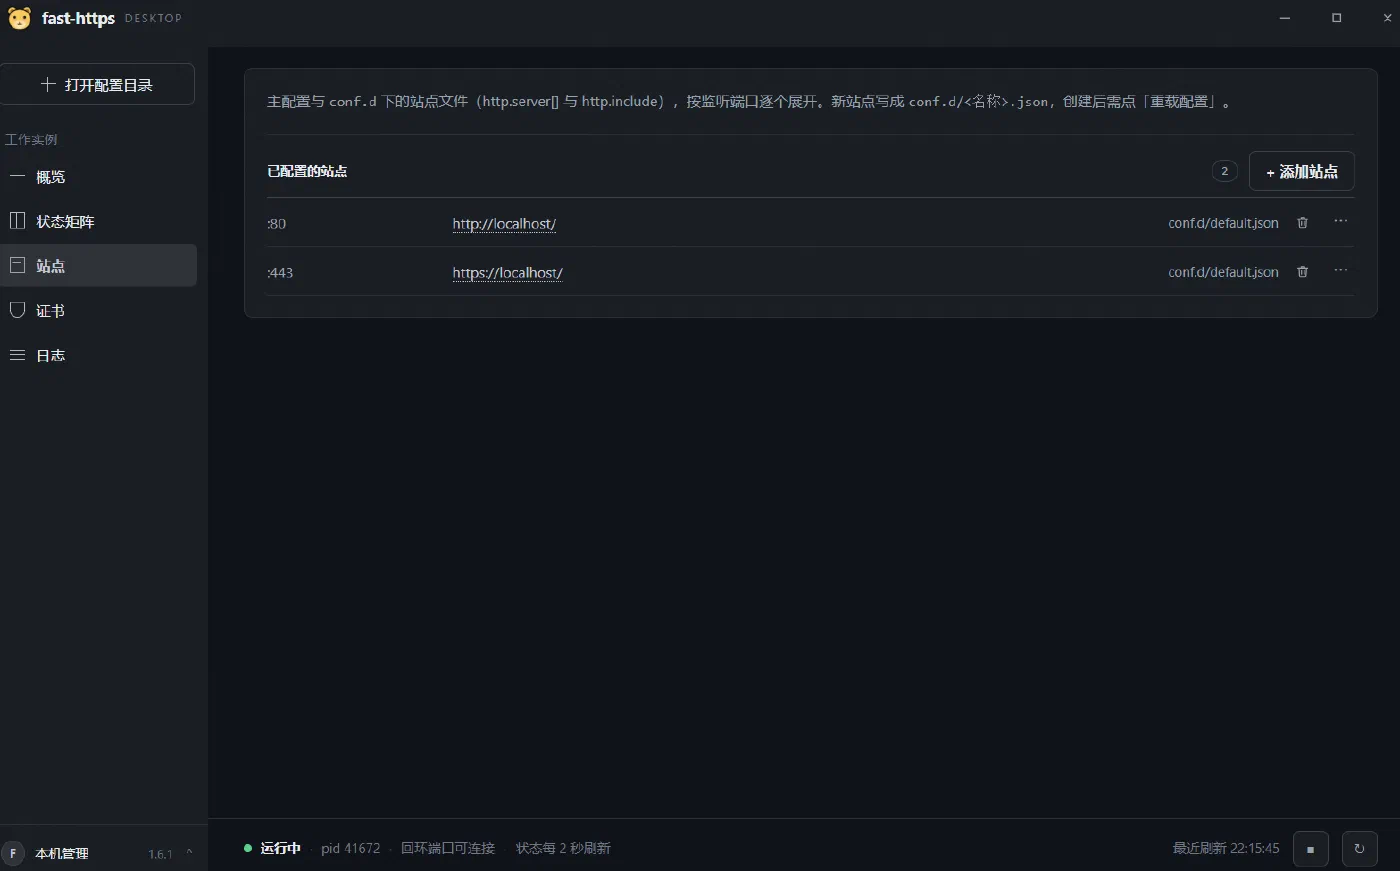
Click «站点» (Sites) in the left menu to list the configured sites. A localhost site listening on both 80 and 443 is included by default; the two share one config file, conf.d/default.json.
5.4 Add a site
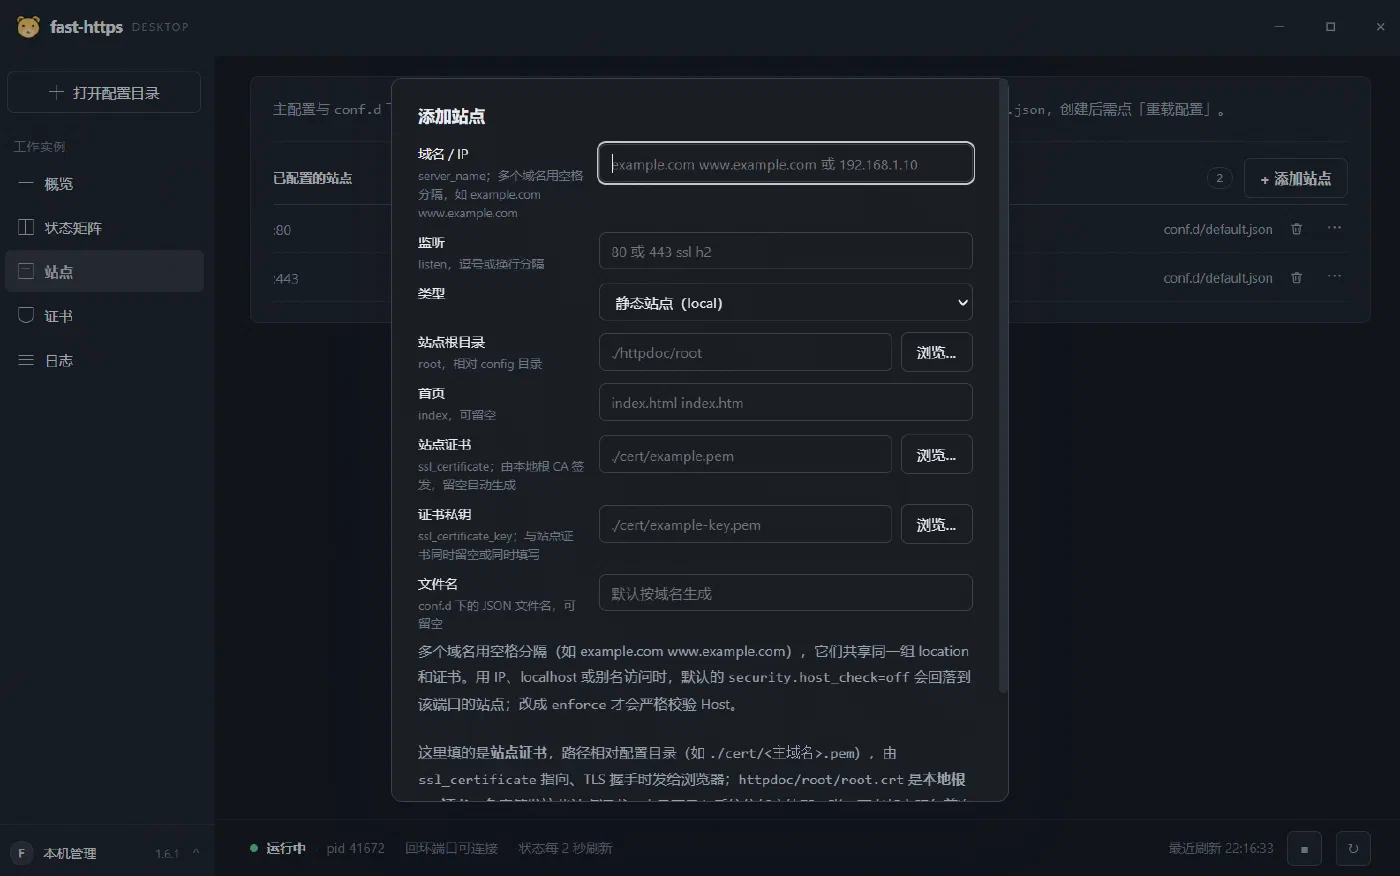
Click «添加站点» (Add site) in the top-right corner to configure a new domain/IP, listening port, document root and SSL certificate. Saving writes a matching JSON file under conf.d/.
5.5 Verify in a browser
Open https://localhost/. The Welcome to Fast-Https ! page means the installation and startup both succeeded.
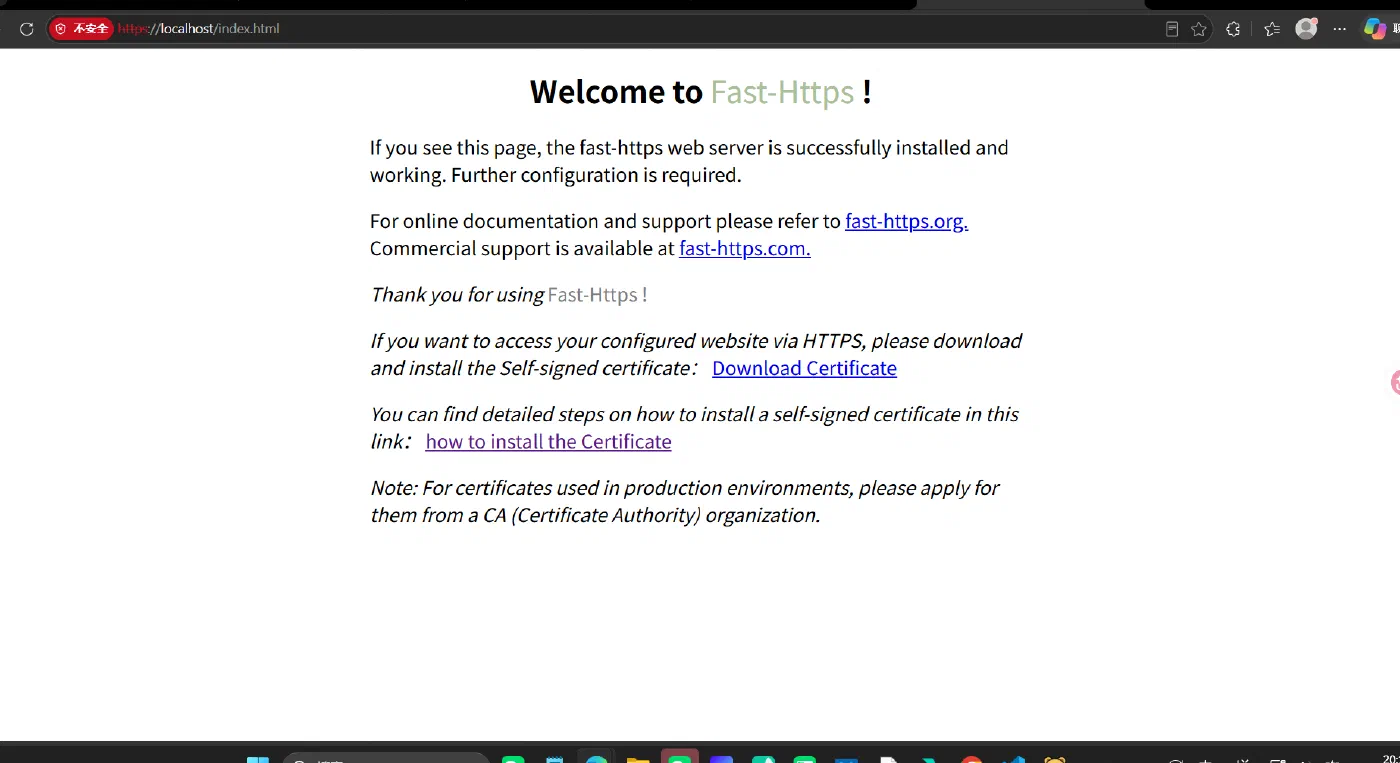
http://localhost/ or https://localhost/ — do not append :8080. The https://localhost:8080/index.html in older docs is the wrong port and results in "This site can't be reached". If ports 80/443 are already taken, use high ports when adding a site in step 5.4.